Mortise Lock Installation Schlage Performance Series™
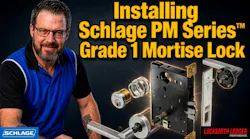
For this Locksmith Ledger Trusted Tools Review series, we are installing the Schlage Performance PM Series™ mortise lock. This is part two of a three-part series on the Schlage Performance Series cylindrical, tubular and mortise family of locks. We covered the grade 1 cylindrical lock in September and will cover the PT Series™ grade 2 tubular lock in December.
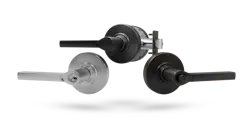
Schlage Performance mortise, cylindrical and tubular locks bring trusted Schlage reliability to projects where budgets matter and applications call for quality, security and simplicity. Built for offices, retail, multifamily, hospitality, they can fit variety of applications — all with design-forward trims and finishes for a cohesive aesthetic.
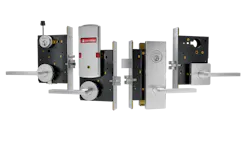
PM Series grade 1 mortise locks are purpose-built with 26 functions, 12 keyed, seven non-keyed, four deadbolt-only, and three electrified functions They offer a broad range of Schlage and competitive cylinder and key system options, lock status monitoring, and lock indication trims. They can suite with other Allegion products throughout your customers’ buildings or complex. In addition, the PM Series mortise locks can suite with the PT Series tubular locks, as they have 10 modern lever styles, two round roses, one square rose, and six finishes, making transitions between entrances, corridors, and interiors seamless.
In this article, we install the PM456 function designed for dormitory rooms, corridor doors, residential room entrances with sectional trim. The PM mortise lock comes with ainstall instructions, door template, an allen wrench, and all the screws required.
Make sure you have the correct handing before getting started. The handing instructions are printed directly on the mortise body lock with a reversible latch bolt that allows handing change without opening the case. Once it’s set for the handing of your door and the door is prepped correctly, slide the mortise body lock into the body portion of the cutout that’s been mortised into the door.
The first step is attaching the large ADA-compliant thumbturn with the two screws, making sure it goes into the square portion. Then we’re going to be installing the lever on the latch side, which is indicated clearly for you. This is on the secure side (locked side) of the door. Make sure the two screw posts go directly through the door, through the mortise body and through to the other side clearly with no obstructions. It’s important to not fully tighten chassis mounting screws at this time.
Next on the internal portion on the inside (the non-secure side), install the square spindle. The short side goes into the mortise body itself and the spring goes toward the outside.
Then identify the spring cage which is clearly labeled “inside” and set it over the spindle, ensuring the arrows are pointing toward the latch side. Two screws go into place and then install the snap-on rose, ensuring the notch on the side is installed towards the door hinge and away from the door latch.
Next, install the handle using a little custom setscrew. Schlage provides the Allen Wrench for tightening, and an extra second screw in case you lose of damage the screw.
Now it’s time to install the mortise cylinder. It will have a required tailpiece on the back side. With the cylinder in place, make sure that both the ring and the spring ring/tension ring are in order on the lock and everything is installed correctly. Once the cylinder retainer screw (accessed through the mortise case) is loosened, it will thread into place.
Once the cylinder is in place, I normally tighten down and then loosen just about one turn, then tighten that setscrew down and install the faceplate. The screws for the faceplate already have a little bit of yellow thread tape on them to make sure that they stay in place.
After the installation, be sure to test the keys. Make sure you can throw the deadbolt. Lock and unlock several times. The deadbolt should retract from the inside when the lever is pushed down, and it should retract with the key from the outside. The lever should not go down when the deadbolt is thrown.
Scan the QR code or visit www.locksmithledger.com/55406512 to watch the full installation video. For more information on the Schlage Performance Series, visit https://commercial.schlage.com/en/solutions/by-family/performance.html
About the Author
 Wayne Winton
Wayne Winton, CRL, AFDI, CAIis the owner of Tri-County Locksmith Services, located in Glenwood Springs, Colorado, and the president of the ALOA Security Professionals Association.