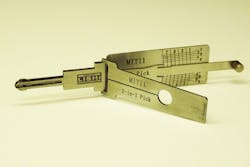
Just before Christmas, I was asked by a friend to make keys for a 2007 Mitsubishi Endeavor. I quoted my friend a bargain price that I quickly grew to regret. At the time I gave her the quote, I thought that I had a Lishi 2-in1 tool for her vehicle, but when I arrived, I discovered that I did not have the MIT11 tool. (Photo 1) If I had that tool, it would have been a 10 – 15 minute job; without the tool, it turned into two and a half hours in the cold and rain. Most of that time was spent on one 10mm bolt that was strategically placed just behind the bottom of the window track in a position that made it impossible to see, and almost impossible to get a wrench on. And naturally, once I had that bolt out, it was even harder to get back into place. (And no, I couldn’t just leave it out, because it held the outside handle on!) That evening, as soon as I got to my computer, I ordered a MIT11 Lishi 2-in-1 tool, as well as a couple of other 2-in-1 tools that I knew I would seldom, if ever, use “just in case.”
Let me share a little of my background, to put things in perspective. I’ve been an automotive locksmith for over 45 years, so you could say that I am “Old School.” I pride myself that I am not a member of NASTF, and that I very rarely use any key code service. I am constantly picking up after the local “Codesmiths” who walk away from a job when they can’t pull the key code, or the locks have been changed. Even though I no longer have Tech-Train Productions, or any other financial incentive, when someone calls my old “Help Line,” I still try to give them the best tech support that I can. But, for the last few years, I have had to bite my tongue a lot. When someone calls asking some really stupid question that shows that they are obviously a codesmith, I am finding it harder every day to resist telling them to “just call a Locksmith.”
The Lishi 2-in-1 tools have totally changed the way I do my job. On vehicles where I would have previously made a key by impression, or by removing and decoding a door or ignition lock, I use the 2-in-1 tools to decode the door lock – usually in less than a minute or two. I then run the cuts through Genericode and finish up my key in a couple more minutes. (Genericode is my personal choice in code software, but other systems that have “fill” programs will work as well.) My average time to generate a key for a Ford product that uses the 8-cut system is probably about 5 minutes. I normally do Chrysler 8-cut locks, GM 10-cut locks, and Nissan 10-cut locks in about the same amount of time. Side-Milled systems such as the Ford 10-cut, and GM “Z” and “V” code series, and VW take a little longer, but not much.
If you don’t know what a Lishi 2-in-1 tool is, you are either new to the industry or simply don’t do much automotive work. All of the 2-in-1 tools are designed to pick the lock, one tumbler at a time, and then use the same probe that was used to pick the lock, to decode the lock. The Lishi 2-in-1 tools are an example of the precision machining that can now be done with computer controlled equipment. These tools are manufactured to tolerances that were either impossible to maintain, or prohibitively expensive, just a decade or so ago.
Picking the Lock
When I show up at a job, I normally get out of the truck with five things: The appropriate Lishi 2-in-1 tool, a can of spray solvent (I prefer LPS Contact Cleaner), a single “Post-It®” note, my magnifying visor, and a knee-pad on my right knee. Younger automotive locksmiths may be able to do without the last two items but sadly, at my age they are essential. The Post-It® note will be used when I decode the lock, and I generally stick it to the window as soon as I reach the vehicle. For this example, I’ll be using a vehicle equipped with the Ford 8-cut system and the Lishi FO38 2-in-1 tool. (Photo 2)
If the vehicle is equipped with a passenger-side door lock, I will attack that lock. As a general rule, the passenger side locks have the least amount of wear and work best for decoding. If there is no passenger side lock, I will work on the driver’s side lock or the tailgate lock if it is a pick-up truck since tailgate locks rarely get used.
Once I have selected the lock, I will give it two or three squirts of solvent and then insert the Lishi 2-in-1 tool. But before I start picking, I will work the tool in and out a few times to exercise the wafers and loosen any hardened grease. Once that is done, I will settle myself into a comfortable position and begin picking the lock. I will use the scale on the side of the tool as my guide as I feel for each individual wafer. (Photo 3)
Most Ford Door locks use cuts 1 – 6, although later models may use cuts 2 – 7 or cuts 3 – 8. It is important to know which wafers are used the lock that you are attempting to pick. My favorite configuration is 2 – 7 because when I hit one of those, I have never gotten more than one possibility back for the final key from Genericode. If cuts 1 – 6 or 3 – 8 are used in the door, I normally have to deal with three possible final keys, but occasionally there will be as many as five, and sometime as few as two or just one.
Once I know which wafers are used in the lock, I will put moderate turning force on the hinged handle of the tool and begin picking the lock. Just as in any other form of picking, the amount of turning force that you use is critical to your success. The correct amount of turning force is something that you will just have to learn by experience and practice. With the turning force applied, I will work my way through the six wafers feeling each one as I go. If a wafer feels “springy” under the probe, I will leave that wafer alone and move on to the next wafer. When I locate a wafer that does not move under the probe, I will apply pressure to that wafer until it “clicks.” (You will often feel the lock turn slightly as the wafer clicks into place.) If the wafer doesn’t move with a small amount of pressure, I will not force it; I’ll just move on to another wafer. Once you have worked your way through all six wafers, I go back and start checking the wafers that had felt springy before. Usually, I’ll find one or two that are now rigid and I will apply pressure to them just as I did before. By repeating this process until all of the wafers have either clicked into place or are too rigid to move, the lock will eventually turn.
Naturally, there is a learning curve when using the Lishi 2-in-1 tools, and practice will give you a “feel” for how the tool works. The basic rules are:
- If it feels springy, leave it alone
- If it feels rigid, move it until it “clicks” and becomes springy
- If it “clicks” but still feels rigid, it is probably in a false notch, so continue moving the wafer until it “clicks” and then feels springy
- Do NOT apply excessive force! That applies to force with the probe on the wafers, and to turning force
- Don’t give up too quickly, but if you make several circuits of all the wafers, release the turning force and start over, or try picking the lock in the opposite direction.
- When starting over, use the knowledge of the lock that you have gained to attack the wafers in a different order.
Due to variances in the manufacturing process, wear on the lock parts, and the bitting of the individual lock, every lock will have its own “Picking Order.” Depending on the direction that you are applying the turning force from, one of the wafers in the lock will contact the lock housing and bind the lock slightly before any of the other wafers. You can feel which wafers are binding and which are not with the 2-in-1 tool through the pick. The wafers that are binding will not move when you apply light pressure. The wafers that are not binding will feel springy.
Once you move a wafer that is bound into its “picked position” at the shear-line, that wafer will no longer be bound and will feel springy when you touch it with the probe. At the same time, the lock will rotate ever so slightly so that the next wafer in the picking order is either bound or bound more tightly than before. As you pick the lock, making a mental note of which wafers seem to have been bound first will help you if you have to start over. If you pay attention, you will have a better idea of the picking order and know which wafers to attack first. Naturally, this is a skill that you can only learn through repeated practice, but if you are willing to put in the effort, it will soon become second nature.
When the Lishi 2-in-1 tools first came out, I was doing a lot of work for a local auto auction that knew that I made training videos and wrote magazine articles. I was allowed to do pretty much anything to the vehicles on the lot as long as I didn’t get in the way and was available to help when they needed me. I spent a lot of time practicing with the Lishi 2-in-1 tools on auction vehicles as well as on an assortment of locks that I had at my shop. I consider this time well spent because I can now approach any lock that I have the proper 2-in-1 tool for with confidence, regardless if I have ever picked one of those or not. To me, one of the most amazing things about the Lishi 2-in-1 tools is that they all work the same way. If you know how to use one on a Ford 8-cut lock, you can apply the same principles to a Mercedes or BMW lock. Naturally, there are differences, but the overall techniques are the same.
Perhaps the biggest challenge with the Lishi 2-in-1 tools is in picking sidewinder style locks that have “Split Tumblers,” such as Honda / Acura and Lexus. On these locks you will have to pick the lock three separate times before you are done. The process of picking the lock is essentially the same, but when it first turns, it will only turn a few degrees and then lock back up. This is because the split-tumblers from trailing side of the lock will drop into the chambers that the split tumblers on the leading side occupied before you picked the lock. You will have to pick those wafers again before the lock will turn the rest of the way. The good news is you will then be working with less than half the tumblers that you were in the beginning and they usually are not fully engaged in the chambers because they are now at a slight angle because the lock has turned slightly. When the lock has turned the second time, all of the wafers will be in the picked positions so that you can then decode the lock to make a key. After decoding the lock, you will have to turn the lock back to the “key pull” position. Naturally, some of the split tumblers will drop back into the wrong chambers and the lock will stop turning before it is all the way back to the key pull position. You will have to pick those wafers once again before you can insert a key into the lock. If you stop at this point and remove your tool, the key will either not go into the lock or it will go part way in and then jam, possibly damaging the lock.
I rarely pick split-tumbler locks with the Lishi 2-in-1 tools, but when I do, it is a huge time saver and money maker. For me, the most common use of this technique is on Honda or Acura vehicles where the ignition lock has been changed and the customer has then lost the keys. By using the HON66 2-in-1 tool, to pick and decode the ignition lock, I can make a new key without ever having to turn the first screw. The alternative method of making a key would involve removing and replacing the ignition lock.
Do I charge less for making a key this way? Absolutely not! I never know when I go in whether I will be able to pick the lock, so I quote the job based on what it would take for me to do it the hard way. If the Lishi 2-in-1 tool works, and it almost always does, I just make more money for less work. (When the tool does not work on one of these locks, it is almost always because the lock is so badly worn that it is about to fail anyway.)
Decoding the Lock
Keep in mind that picking and decoding the lock are two separate operations. Yes, the same scale is used in both operations but in picking, you only need to pay attention to the part of the scale that shows you the spacing of the lock. This shows you which tumbler you are attacking. The depth scale is meaningless during the picking operation; the depth scale only comes into play after the lock has been picked.
Once you have the lock picked, you can then begin decoding it. Use the probe to feel for each tumbler in turn and record the readings that you get. Because you are reading the lock in the picked position, the readings are normally very accurate. But there are several things that can give you incorrect readings:
- Worn or damages wafers
- Not having the tool absolutely straight in the lock
- Sloppy or cheap locks that have poor tolerances
A worn wafer will generally give you a reading that is deeper than the correct reading because metal has been worn away from the wafer. The wear on the first wafer on a six-wafer lock, like in the Ford example above, will be much greater than on the second wafer, while the wear on the second wafer will be much greater than on the third wafer. Generally, if you are going to get a bad reading due to wear, it will be near the front of the lock. My rule is that if I get a reading on any wafer that comes out between two depths, especially near the front of the lock, I will choose the higher (shallower) cut. Damaged wafers are much harder deal with and if I think I am dealing with a damaged wafer, I will move to a different lock if possible, or make my best guess and then put a question mark under that guess on my note.
Just as there is “Parallax Error” in sight reading, if you are not looking at the lock from the centerline, there will be a similar error if the 2-in-1 tool is not held straight in the lock. After I have the lock picked, I will normally try to rock the pick up and down in the keyway. If there is significant movement, I will pay special attention to the position of the entire pick as I am taking my readings. Any misalignment of the tool will give you inaccurate readings. If the tool will rock up and down after the lock has been picked, it is usually caused by wear on the warding inside the lock. Some locks only have warding at the front of the keyway and not down the full length of the keyway, so the cuts closer to the tip of the tool will not read correctly unless you make sure to keep the tool straight in the lock.
Some locks are just not built to a high enough standard for the 2-in-1 tool to get an accurate reading without adjusting the position of the tool while you are taking your readings. The GM Z-Keyway locks suffer from this problem. Whenever I am decoding a Z-Keyway lock, I will use extra care as I am decoding it and then make my best guess. (This is another usage of the tool that will require practice.) On the Z-Keyway locks, if I am unable to get a legitimate bitting from my fill program, I will cut my best guess and then do a little impressioning to finish the key. In extreme cases, I have cut a key one depth shallower than what I read and then finished the key by impression. On several occasions, I have come up with a key that works perfectly in both the door and the ignition but is not a legitimate bitting according to Genericode. In those cases, I will just go with what works, and move on.
Vehicle Entry
Once I had gained proficiency with the Lishi 2-in-1 tools, I began to use them for vehicle entry as well as for key generation. This gave me opportunities to gain practice with the tool and impressed the heck out of my customers. Even though I put the original Jiffy-Jak tool on the market in 1999, I have never been a fan of using long-reach tools to unlock everything. There are lots of vehicles out there where I do use the Jiffy-Jak, but by far I do most of my lockouts with the Lishi 2-in-1 tools.
I was recently called out to unlock a Dodge Ram pick-up at a home improvement store near my shop. As soon as I got out of the van, the lady who had called said “You’re not going to use one of those long ‘rod things’ are you? The last guy really scratched up my truck with one of those.” She was delighted when I unlocked her truck with the CY24 Lishi 2-in-1 tool. She was also surprised at how quickly I unlocked her truck. She told me that the guy who scratched up her truck took much longer. She gave me a glowing review online afterwards.
I especially like the HU101 2-in-1 tool for Ford and Lincoln vehicles that use the side milled keys. (Photo 4) This tool also works on the late model Jaguar and Land Rover vehicles as well. The full-size Ford Transit vans are a real challenge to unlock with the Jiffy-Jak primarily because of the tight fit of the doors and the height of the doors. So far, I have managed to unlock every Transit van that I been called out for with the HU101 Lishi 2-in-1 tool. (I did use the Jiffy-Jak on one Transit Van to reach through the barricade behind the front seat and unlock the rear door to retrieve a set of keys that were locked in the rear of the van.)
New Lishi 2-in-1 Tools
A couple of years ago, Lishi began to manufacture 2-in-1 tools for motorcycles. If you work on many bikes, you need to investigate these tools. I recently did a Yamaha Royal Star in just a few minutes. In the past, I would have had to pick the gas cap lock, disassemble the gas cap, and then progress two cuts in the ignition. That one job more than paid for the tool that I used to pick and decode the ignition lock.
The latest announcement from Lishi is a line of 2-in-1 tools for pin-tumbler locks. None of these tools were available at the time that I am wrote this article, but I have seen several video demonstrations of some of the new tools. In the videos, the tools appear to work just like the rest of the 2-in-1 tools. The applications that I have seen so far are for Kwikset and the Schlage “C” keyway. I look forward to trying some of these new tools for residential lockouts.
A Word of Caution: The “Genuine Lishi” tools are all designed and manufactured by Mr. Li in China. Unfortunately, due to the lack of copyright and patent protection in the Chinese marketplace, there are a lot of “look-alike” or “knockoff” versions of Mr. Li’s tools on the market. As a result, he has had to go to extraordinary lengths to protect his product line. The genuine Lishi tools now come with a picture of Mr. Li on the tool (Photo 5) and a scratch-off label on the back (Photo 6) for verification that the tool is actually made by Mr. Li’s company.
Quite some time back, I purchased a CY24 2-in-1 tool for Chrysler products, but could NEVER get it to work. I was very disappointed at the time because my other Lishi tools worked so well. As it turned out, I had gotten one of the early knockoff tools. When I bought a second CY24 2-in-1 tool that I knew was the real deal, I was amazed at how easy it was to use on Chrysler products. I have compared the two tools carefully with a magnifying glass and I simply cannot see a difference in the two, other than in the labeling. (Photo 7) With the genuine tool, I have made keys to or unlocked hundreds of Chrysler products. I have NEVER successfully picked a single lock with the knockoff. When you buy a Lishi 2-in-1 tool, make sure that you are getting the genuine article.
Note: All of the photos included with this article are of my personal tools. Most have seen a lot of use and were purchased at different times; many were purchased before Mr. Li’s picture was added to the tools. All of the tools shown, with the exception of the CY24 knockoff, are the real deal.