LCN 6400 COMPACT Installation
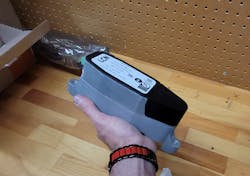
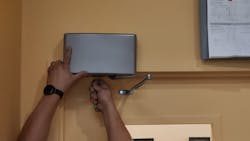
With the world moving to touch-free solutions, such as automatic door operators, there’s a HUGE demand for skilled installers and easy-to-use products. This is why we believe that the LCN 6400 COMPACT automatic door operator is such an amazing product. (Image 1)
We recently installed one and found that it’s lightweight and easy to install. It also is the only door operator that literally slips right onto an existing door closer! This saves space, time and money for all parties involved. In the fast-paced and instant-gratification world we live in, Allegion really hit the nail on the head with this product, and we can see why it has won awards.
Check the Closer

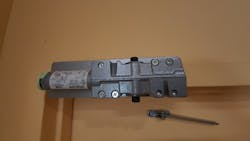
Make sure you have a solid door and frame that isn’t bent, warped, rusted or loose. Hinges must be tight and adjusted properly — making this an ideal time to offer a continuous hinge if the door has bad hinges — and the door must be capable of handling the operator. (Image 2)
The next thing you must confirm is that the door has an LCN 4040XP door closer installed properly, because the 6400 COMPACT requires one for operation.
If the door has the right closer, you have to doublecheck all measurements to confirm that it is, in fact, mounted per factory specs. Please don’t skip this step, because the added stress of the motor-driven operator will destroy the operator and the door. I can’t say this loudly enough: NEVER TRUST ANOTHER INSTALLER’S WORK! It’s your responsibility to make sure the closer is installed properly before you add an operator to the equation.
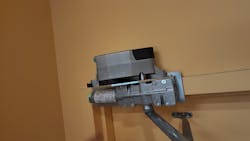
After you determine that the door is ready to accept the upgrade, block off your work area with orange cones and caution tape. You never can be too careful! (Image 3)
I also want to take a moment to caution those who aren’t savvy with wiring or who simply don’t have much experience or training to consult a professional who specializes in wiring. Also, check your local and state laws to see whether a low-voltage license is required to perform this type of work. If so, DO NOT attempt to wire up your operator.
I know my limits, and I hire professional people to fill in where I’m not an expert. For this installation, I worked with John Nolan from Reliant Security who is a wiring specialist.
Installing the Closer
If your door doesn’t have a 4040XP door closer, you have to install one. You first must decide whether you will do a parallel mount or a 90-degree-angle mount. We used the latter for our installation.
The next step will be to attach the mounting plate. Using these mounting plates will give you enough room to mount the door closer onto the frame and provide a much heavier duty, long-lasting installation. (Image 4)
I always use a slightly smaller drill bit to pre-drill the holes rather than rely solely on the self-tapping screw. (Image 5) It’s faster and less fatiguing on the body. We used this method to mount the first screw on the mounting plate so we then can pre-drill the rest of the holes. (Image 6)
Now, we measure out vertically where the arm will attach to the door. We mark it out with a center punch to create a divot so the pre-drill stays perfectly on target. Note: You can use self-tapping drill taps to put a 1/4 x 20 thread directly into the door or frame. The taps work extremely well, but you have to be careful: Steel that’s more than one-eighths-inch thick probably will break your tap.
When your closer is mounted onto the plate, check the directions and make sure that the Allen-head screw that goes to the valve on the back of the closer is rotated down all the way. (Image 7) If you miss this step, you’ll have to take the entire door closer off and start over. This valve is turned out ONLY for shipping purposes.
Next, attach the arm in its 90-degree position to the door. (Image 8) Keep in mind, this device carries a UL listing ONLY if it’s installed with the screws that came with it. This is extremely important, and it’s a step that a lot of installers forget. After the arm is attached, we add the screw that pairs the arm mounted to the door to the closer. (Image 9)
Now, it’s a matter of adjusting the preload on the arm. The arm can slide back and forth until you get the proper adjustment. You have to make sure the door closer is adjusted properly. The correct adjustment for closing speed should be seven seconds from a 90-degree angle to completely closed and latched.
Three adjustment screws control this. The back check controls how fast the door opens and prevents wind from catching the door and blowing it out of control. The door sweep controls the door while it closes and is the largest controller of the door. The last and final adjustment is the latch speed. As the door comes to the last 20 degrees or so of closing, there has to be a little extra force to get the door to latch and seat properly. If you get this right, it will make the door close nice and smooth and be easy for anyone to operate. If not, the device will wear out prematurely or even injure someone.
Installing the Operator
To install the 6400 COMPACT door operator, we start by taking the top bolt off the door closer and installing the bolt that goes with the operator. Be careful, because the door will have preloaded spring tension when you remove the screw and arm, if necessary.
After the mounting plate is attached firmly, you can install the operator. (Image 12) Again, this should be fairly straightforward and easy to accomplish. If you find that the pieces don’t fit together well, doublecheck your last step and make sure nothing is backward or upside down before you move forward. The 6400 COMPACT lives up to its name: It’s a compact unit that can fit on many applications, including the hallway door where we installed it. Again, make sure there’s absolutely no space between the mounting plate and the operator.
Congratulations, the mechanical aspect of the job now is complete, and it couldn’t have been quicker and easier.
Powering Up
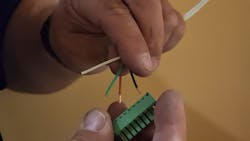
Now, it’s time to wire up the 6400 COMPACT. We start by pulling the terminal block out to access it more easily. (Image 13) After that, you can connect the wires.
Be sure the wires are trimmed properly and prepped for installation. Failure to do this will result in a short or faulty operation. A good rule of thumb is if you can see bare wire after the connection is made, the stripped wire is too long, so you must trim and reinsert. Conversely, if the wire isn’t stripped back far enough, it won’t make a connection, so you have to find the sweet spot to make a connection but not have bare wire exposed.
This is where you decide whether you’ll run the door operator off the power supply that it came with or tie it into an electronic access control (EAC) system and run power from a power supply station.
The reason you have to know this is if you run an electric strike or maglock to release the door for security, the operator has to communicate with the lock so they don’t fight each other. For example, if your door operator isn’t wired properly into an EAC system to coordinate the timing of a button push to activate the door operator, the operator will try to open a locked door, because they aren’t cohesive. The lock has to unlock to allow the door to open on a secure facility.
We did two different installations, one for a basic installation that had no EAC and one that included an electric strike. The following is for when using the 6400 COMPACT in stand-alone mode only. We’ll report on hooking the door operator up to an EAC system in a future issue.
For stand-alone use, the 6400 COMPACT has a transformer that converts 120VAC power to 24VDC at 2.5 amps. (Image 16) DO NOT TRY TO POWER ANY OTHER DEVICES OFF THIS UNIT! You simply install two wires to the respective terminals — black on the negative terminal, red on the positive. We hooked up the power to the motor terminal block before we attached it to the power supply. This was done so it would be impossible to short things out.
You can use the wire supplied with the 6400 COMPACT or low-voltage CAT-6 wire that’s rated to take the voltage and amperage the distance necessary to travel from a 120V outlet to the operator. After it’s installed, you plug the power supply into the wall. (Image 17) Be sure the wire run from the outlet to the door operator includes conduit or surface-mount wire molding to protect the wire and make the job look clean and professional.
Final Steps
The wiring portion complete, we now focus on programming and adding the wireless buttons to activate the 6400 COMPACT. Make sure the door is closed and press the calibration button twice. (Image 18) Now, open the door to the angle you want the door to open to. You’ll see a blue light that indicates that the angle and desired door swing have been registered. Note: The swing angle will depend on the installation geometry of the closer and how it was installed. We were set at 110 degrees open with our application.
At this point, you can set the opening speed. The 6400 COMPACT has five settings. Choose the one that meets your local and state laws and requirements for the customer. This also would be a good time to make sure that a door loop (the steel cable protector) is affixed securely to the wall and door operator. The loop ensures wires aren’t being pinched and stretched or pulling on the connections.
The door now operates on its own and receives a signal from the buttons. This is the time to make sure the door opens and closes at the proper speed and pressure for your state ADA requirements.
Remember, your installation must comply with all local, state and federal codes and rules along with building, fire-code and ADA requirements. Our installation requires 15 pounds of pressure to pull the door open with nonoperator assist. The door opens at a nice, controlled speed, and when closing from 90 degrees to fully closed, the door takes about 5 seconds to reach the latching position and 2 seconds from latching to closed for a total of 7 seconds.
Here’s a tip: If you were to put your hand in between the door and the frame when the door closes, would your hand be injured? I’m not saying stick your hand in the door, but think about young children who interact with the opening. Are they safe? Will the door knock over an older person who uses a walker? Do they have enough time to get inside if they use a walker or wheelchair? Does the door close softly enough to not injure someone in the entry way? Consult your local laws and codes to confirm.
I also highly recommend having your door inspected by the local authority having jurisdiction to get it in writing that your installation is approved. Words mean nothing; paper is proof. I mention all the precautions only so you’re able to cover your assets and not get in trouble down the line via a fine or even a lawsuit.
We finally complete the project by installing the cover. (Image 18)
All in all, the 6400 COMPACT is a fantastic product that’s easy to install and can deliver a large profit margin when your part markup and labor is charged correctly. Expanding your skillset to include door operators such as this will be a great addition to your company. I highly recommend getting on the EAC train while the market is in demand for qualified technicians.
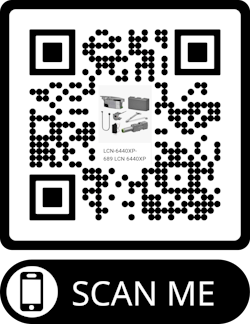
Wayne Winton is the owner of Tri-County Locksmith Services, located in Glenwood Springs, Colorado. Scan the QR code to watch a video of the installation. The video shows the EAC installation.
About the Author
Wayne Winton
Wayne Winton, CRL, AFDI, CAIis the owner of Tri-County Locksmith Services, located in Glenwood Springs, Colorado, and the president of the ALOA Security Professionals Association.