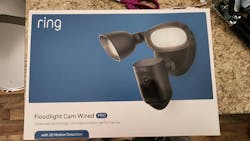
A New Profit Center: Camera Installations
In this installation, we will be replacing an existing porch light with a Ring Pro floodlight wired video camera.
Why would your customer want to upgrade to this? One of the reasons is energy efficiency. The LED lighting is going to cost less than standard lighting, reducing energy consumption and saving them money on their electric bill.
Why is this a good option for the locksmith? The camera is built into the lighting system and it is simple to wire, which makes for a quick installation. One caution: your state, city or county requires an electrician or someone with an electrician’s license to do this. Make sure you know and follow those laws and regulations.
This stuff is easier than our normal job. However, people are afraid of it, so they want a professional to help them. If you take just a few minutes to learn the process, so you can have successful installations and add a lot to your bottom line.
Installation
An important first step is to turn the breaker off and verify that the fixture is not receiving any current.
An unexpected hazard on this installation was an undesirable wasp nest in and around the existing fixture. This older, external fixture was infested, inside and out. There were actually three nests. Be sure to bring along some bug spray and check the fixture before starting work.
Then you start by removing the screws from the existing light fixture to reveal the housing from that lighting fixture.
The nice thing about Ring is that it’s a pretty universal mount. In photo xx, you can see that I’ve got that center stud mounted. It literally just goes right on.
The wiring is fairly basic. You can use the wire connectors that come with the Ring, but make sure that you tuck the bulk of things in the back of that particular housing.
The wires come pre-stripped. You simply put the two connectors together – I like to twist them together – and then add that wire nut on top of it. The color coding is based on the Ring directions. Photo 7 shows all three wires attached. It’s as simple as positive, negative and ground. Again, be sure you are legally able to do 120-volt work in your jurisdiction.
Photo 10 shows an extra hanging piece, so that the wires aren’t supporting the weight. You literally put it onto the housing. The two studs will come through the holes and then the screwdriver doubles as a nut driver when you pull the Phillips head portion out. It tightens those nuts down. One tool does everything you need to do.
Now that it’s fully installed, the next steps are to aim the camera and aim the lights. Again, I’m using that hex tool. It fits perfectly over that little nut and tightens it down and acts as a wrench, so you don’t need to go to your toolbox.
These things are designed to be DIY, but people will pay a locksmith to install them, especially if the locksmith is rekeying the house or already doing other work for the customer.
Notice the label on the underneath side. Some of these have a QR code that will be used to set everything up. There also will be a piece of film over the camera that you’ll need to remove.
Go to the App
To get everything up and running, you will need to scan some QR codes on the customer’s phone. Do not do this on your phone. You don’t want to pair cameras to your phone; they need to be paired to your customer’s phone.
Photo 19 shows the QR code. I will get my customer to bring over their phone and I will walk them through the process. They download the app of whatever system has been installed, and it walks you through the setup, step by step.
Your customer will need to have their Wi-Fi password, and you just type in and label the particular item (Front Porch Flood, for example) and go through a simple automated process.
Now we’ll go into some more technical stuff, where we can set smart alerts. This is really up to the customer, but I do recommend walking them through the steps, setting up motion sensors and determining how sensitive they want that motion detection to be. You can add different customizations, and I always show the customer how to get to those customization menus, so they can make changes in the future.
Wayne Winton is the owner of Tri-County Locksmith Services, located in Glenwood Springs, Colorado. For more information, check out Wayne’slockshop.com and lockreference.com.
