There’s no point in upgrading locks on a heavily used commercial door – or, for that matter, any door – without first taking a good look at the entire opening. Sagging doors have always been an opportunity for the professional locksmith. Hinge and backing tab deterioration are especially vulnerable in hollow-metal doors and frames. Heavy traffic, abuse, lack of maintenance, corrosion, and inadequate frame attachments, all lead to premature failure.
Sagging doors are at least partially caused by gravity, so sagging can be difficult to prevent. Here are three potential solutions.
- Before the door is installed. For new construction or new doors being installed, make sure the doors are specified with the correct weight limits per number of hinges per your manufacturer’s recommendations. If there are concerns for particularly heavy or high-traffic doors that take a lot of rebuttals, try specifying or recommending a continuous hinge. The anchor hinge will help to spread the weight throughout the top of the frame, and the continuous hinge will help to spread the weight throughout the side of the frame. That’s instead of having most of the weight and rebuttal on that poor, overworked top hinge.
- Preventative maintenance: When you already are working on a door or happen to be walking through one, keep your eye out for tighter-than-normal clearances, particularly at the top of the latching side and the bottom corner of your door. Take a glance at the top hinge. Do the screws look loose? These are early signs of door sag.
- Lift, align and reinforce. First, lift the door by using a few wedges or an inflatable wedge to let that door release all that weight. Then, align the door in the frame with the correct clearances. Last, after the door is aligned properly, you can screw in a high-frequency reinforcing pivot. These reinforcing pivots might not be the most attractive piece of hardware, but they sure hold their weight, and it certainly beats reinstalling the door and frame.
Continuous hinges offer attractive, durable (and profitable for the locksmith) retrofit solutions. According to our Locksmith Ledger 2023 National Average Price Survey, a continuous hinge installation averages $270.
“For most commercial doors that draw a decent amount of traffic, I recommend having a heavy-duty ball-bearing butt hinge that meets ANSI/BHMA A156.1 Grade 1. These hinges are a well-oiled machine — simple to replace, easy to shim and have been cycle-tested more than 2.5 million times. So when would you want to use a continuous hinge instead of a heavy-duty butt hinge?” said Benji Bolick, The Door Dork, senior digital communications specialist at ASSA ABLOY Opening Solutions.
There are several advantages a continuous hinge has over a heavy-duty butt hinge. First, they help with door weight and pressure distribution. On standard butt hinges, most of the door’s weight hangs on and pulls on the top hinge. A continuous hinge distributes that weight evenly throughout the frame. As a result, your opening will stay in alignment longer, and the longevity of your opening will increase.
Second, they help with security. An intruder who encounters a continuous hinge would have to cut through the entire edge of the frame to remove your door. If you used a butt hinge, the intruder simply could cut through a few small hinges to gain access to your facility.
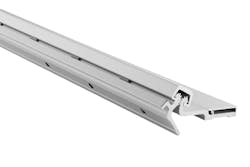
Continuous hinges come in two basic varieties: pin and barrel (piano hinge style), and aluminum geared hinge versions. The stainless steel versions of the pin and barrel hinge have some advantages in hospitals, food service, or areas where harsh cleaners or corrosive chemical atmospheres might be an issue. On the other hand, the geared aluminum continuous hinge tends to have more load-bearing capacity, a wider range of applications and considerably lower cost.
Three-hour fire ratings are now available with both types, and both types distribute the load over the entire edge of the door and frame.
It is important to consider the door width, thickness, weight and clearance when choosing a hinge. Full-surface hinges that fit tight door jams have now made retrofit applications pretty much universally practical. Narrow-faced frame versions now allow full-surface aluminum geared continuous hinges to be applied to most existing doors with no need for surgery on the door or frame.
Distributing the weight and kickback across the entire door and frame edge, dramatically increases the load the hinge can carry and life-cycle of the assembly. Hinge maintenance is becoming a thing of the past. The most startling fact is that one continuous gear aluminum hinge has tested to 25-million cycles – 10-times the ANSI/BHMA A156.26-2012 American National Standard for Continuous Hinges.
Mounting Styles
There are four basic mounting styles of continuous hinges on the market today with a couple of variations that you should know about. They are:
1. Surface Mount
2. Half Surface Mount
3. Fully Concealed
4. Specialty
All four are available in a variety of materials, such as steel or stainless steel. Two and three are popular, but they’re not as much so as the full-surface mount models. One reason is that surface continuous hinges commonly require the least space between door and frame than the others. The general accepted gap between the door and the frame opposite the hinge of a full-surface continuous hinge is 1/8 inch plus 1/32, or 5/32 inch. With the others, this gap is usually more, which means that it may be impractical to use them in a retrofit situation.
All types of continuous hinges come in an assortment of finishes, such as brass, Nickel, and charcoal--in addition to standard and heavy duty. Most of the time you, as a locksmith, will work with surface-mount continuous hinges--‘pin and barrel’ or geared.
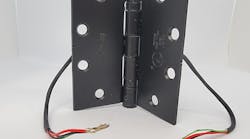
The fourth type is a specialty hinge. They represent specific kinds of continuous hinges designed for specific applications. A good example is a continuous hinge equipped with wired connections for an energized lockset mounted inside the door for access control.
Installation Tips
Before you begin retrofitting a door with any type of continuous hinge, you need to measure the door and the opening in which it fits. As mentioned earlier, a surface-mounted continuous hinge requires about 5/32-inch between the door and the jamb on all sides. Some locksmiths insert slotted screwdrivers on all sides to shim the door while others make use of tongue suppressors or popsicle sticks. Take your pick.
Consider the following steps as a general explanation of how to install a full-surface continuous hinge in an average door opening. However, always refer to the hinge manufacturer’s installation instructions before proceeding.
- Remove the pivots or other hinges from the door.
- Shim the door on all sides, being careful to maintain proper spacing on all sides.
- Measure the height of the door and cut the continuous hinge accordingly.
- Mount the hinge to the frame first and then the door (Some experts say to mount it first to the door).
- Use the screws and other hardware provided by the hinge manufacturer. Substituting may place the door installation in jeopardy.
- Be sure to use several through-bolts so the door cannot be removed from the continuous hinge from outside. Be sure to space them over the length of the door and frame.
- Where applicable, install a hinge cover over both of the extended leafs.
An Alternative Installation Method
The conventional method of installing a continuous hinge takes at least two technicians and many hours. It’s one of the most labor-intensive jobs that most locksmiths perform. What if there was a faster, easier method?
Locksmith Ledger contributor Wayne Winton demonstrates his method of installing the hinge without removing the door. See the video at www.locksmithledger.com/21270882
Power-Transfer Choices
If you upgrade a door to electronic access control (EAC), wired continuous hinges are an option. In these hinges, most of the hinge is mechanical, and a small section of the hinge that’s mounted separately contains the wiring. Repairing or replacing a defective wired continuous hinge, thus, is relatively easy, and the door doesn’t have to be removed, or its use suspended while the door is being repaired (except for when wiring and final installation is performed).
When determining the best power-transfer device for your application, answer the following questions:
1. What type of door is at the opening? The type of door can help you to anticipate the degree of difficulty of the installation.
A solid-core door represents a challenge to get conductors from the hinge side to the lock location (the latch edge).
Hollow metal doors aren’t exactly hollow. Bracing and internal intumescent material might be inside the door, which will complicate installing the wire. Drilling a fire-rated door could affect the rating.
Aluminum glass storefront doors and frameless herculite doors require special treatment to wire them.
2. What is being wired to the door?
Devices installed in doors typically are switches or sensors, electric-locking or latch-retracting solenoids, or electromagnetic devices.
The duty cycle and current draw will control the diameter and number of conductors transferring between the frame and the door.
Some devices require power or a connection only while the door is closed. This would include fail-secure locksets that must energize the lockset while the door is closed to allow the lever to become functional and enable the door to be opened.
Other types of locks require continuous power regardless of door position to ensure smooth operation. An example would be door-mounted electromagnets or exit devices that use latch retraction.
Interrupting power might result in latch-syncing issues or prevent the door from closing and latching. Many electronic devices don’t operate well in environments where power is interrupted frequently.
The type of device also will determine the power required to be carried on the transfer wires as part of a switching circuit or to operate the lock.
If you service an existing locking system, you should conform to the original locking system circuit design when considering replacing the power-transfer device, unless the problems with the door system points to a design error with regards to the power-transfer product specified.
If you upgrade to a different lock or system, it also might require rethinking the power-transfer hardware.
For More Information
Following is a list of the major hinge manufacturers and their websites. Also check with your local locksmith distributor.
- Pemko, part of ASSA ABLOY Architectural Hardware: https://www.assaabloydooraccessories.us/en/
- Architectural Builder’s Hardware (ABH) : https://www.abhmfg.com/
- Select Hinges: www.select-hinges.com
- Ives, an Allegion brand: https://us.allegion.com/en/home/products/brands/ives.html
- Precision Hardware, part of dormakaba: www.bestaccess.com
- National Guard Products (NGP)
- PBB Architectural: https://pbbinc.com/
- McKinney, an ASSA ABLOY Group company: www.mckinneyhinge.com
- Marray Hinge: www.marray.com
- SDC Security: www.sdcsecurity.com
- Hager: https://www.hagerco.com/


