With safe work being my specialty and primary source of income, I often am asked what system of locking — mechanical or electronic — is better. My honest opinion is it depends on the users’ requirements.
Mechanical Vs. Electronic
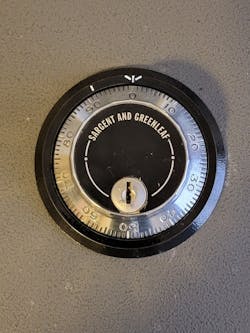
Mechanical locks can be opened twice a day for 10-plus years with little to no issues when properly operated and maintained. They’re more difficult for most customers to operate and take longer to open, but they’re reliable. No electronic bypass or chance of electronic failure exists here. With practice, these locks can be opened in less than a minute if you open them frequently and stay in tune with the safe. Bypass options include manipulation (a highly involved skill that few in the industry possess), auto dialers (expensive investments) and drilling.
The decision to go electronic or stay mechanical boils down to who has to access the safe, how often and for what purpose. If only one person operates the lock day in and day out, a mechanical lock is preferred. Multiple users, however, can get confused easily. If older people require access to a safe, a mechanical lock can be somewhat frustrating. If it’s for a business, then trying to train employees on how to operate one can be difficult as well. Those who have poor vision also might have trouble operating the mechanical locks.
For commercial applications that have a high turnover rate of employment, it can be frustrating to have to call a professional to change the combination frequently or, at odd times in such an event of a late-night termination of an employee, when requiring emergency service and emergency rates — if we can make it to the business at all.
Electronic digital keypad locks are much easier to operate for the whole family or multiple employees. They’re faster to use and have easy-to-read numbers, so they also would be ideal for use by the elderly. If you have to change the combination in an emergency, you can do it yourself.
Dual-action safe locks blend the best of both worlds, providing the convenience of electronic access along with the reliability of a mechanical backup. Unfortunately, that allows double the potential bypasses, too. For example, the mechanical-redundant locks can be bypassed by electronic boxes or spiking and mechanical options, such as manipulation.
As far as protecting the contents of a safe, what I tell customers is that having layers of protection and security is the best plan. One dial-style mechanical or electronic lock and one keyed lock (Sargent & Greenleaf FAS or something similar) on TL-rated safes that have two lock options would be my preference, along with an alarm system attached to internal bolts to prevent tampering from the outside.
Then, for ultrahigh-value contents, I’d suggest multiple cameras monitoring the safe that are recorded to a digital video recorder (DVR) that’s stored in a secure location with battery backup, in case power is lost. Taking this route ensures that the feed can’t be accessed or hacked remotely.
Separately, a cloud-based live recording system as backup in case the DVR is stolen is best. There isn’t a system that’s foolproof, but these options increase the probability of the criminal being caught — assuming they’re successful to begin with.
So, the answer as to what lock is better is completely situation-driven. I want my customer to have a secure, reliable system that they’re comfortable operating and can do it with ease.
Removing the Old Lock
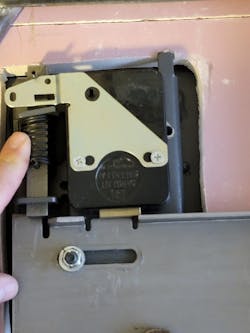
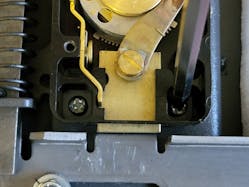
The first step in a lock swap is to remove the relocker plate screws. This will force the heavy spring on the relocking device, and this is where most people get in trouble. In fact, it’s the No. 1 reason behind an accidental lockout of a safe. Most commercial safes have an automatic trigger that will throw the bolts when the door is shut. If this happens while you’re swapping out the lock, your relockers will fire and you’re sure to have a bad day attempting to defeat them. (Image 3)
My suggestion is to leave the safe lock locked and install the bolts of the door in the locked position. You literally lock the safe open so you can’t accidentally remove the lock and still have the relocker fire if the door accidently shuts.
Now you’re ready to remove the lock. After removing the back cover, you’ll remove the spline key with the use of pliers or, more preferable, vise grips. When the spline is pulled out, it allows the dial to spin out of the drive cam so the lock and dial can be removed. (Images 4 and 5)
Now, simply thread the dial off the drive cam just as you would unscrew a bolt from a nut. Next, remove the Phillips head screws from the lock body. There should be four total if it was installed properly. (Images 6 and 7)
With the lock removed from the back of the safe, the last step is to remove the dial ring by using a Phillips head screwdriver. (Image 8)
Installing the New Lock
Now that the old lock is out of the way, we can begin to install the new electronic lock. Before doing anything, it’s very important to test-fit the lock to make sure the mounting holes line up. Most electronic locks have only three mounting bolts, and this is OK. Just make sure the locking bolt fits properly in the bolt work. If it isn’t long enough to block the bolt work, you’ll have to have a different option.
I recommend and use two electronic locks, the American Security ESL 10-20 and the Securam swing bolt. These locks are high quality and have a statistically low failure rate for up to 5–7 years.
At this point in the lock swap, I check to see whether the square-bolt full retraction of the ESL 10 or the Securam swing-bolt lock would be the way to go. (Image 9) Some safes will bind if you use a swing bolt and some don't have enough clearance for the full square bolt of the ESL 10. That’s why I stock both options. On most gun safes, either option will work. For this particular installation, I chose the Securam.
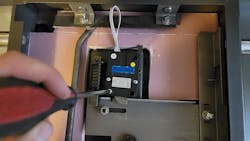
The first step is to attach the keypad studs in the existing predrilled and tapped holes on the front of the safe door. The keypad just slips on the studs and slides right on. (Image 10) Then, you slide the connection wire through the spindle hole to the inside of the safe where we’ll attach it to the lock. When you connect the wires to the lock, it can go in only one way. (Images 11 and 12)
It’s important to keep a small gap between the lock bolt and bolt work of the safe. Electronic safe locks won’t work if there’s tension on the lock bolt. (Images 13 and 14)
After you attach the battery to the lock keypad, you should test three times to successfully open and lock the safe. I moved the relocker to a neutral position, so I can test the function of the lock.
The relocking plate now can be reinstalled to keep the relocking device in the correct position. You might have to redrill the mounting holes in the relocking plate so it lines up on the new lock or make a new one. (Image 15) I then try the lock three more times. You can’t overtest.
I now put the back cover on the safe (Image 16) and again test three more times BEFORE I shut the door and then — you guessed it — three times after fully closing the door. You might believe that this is excessive, but if you lock up a nasty safe, such as a TL 15 or TL 30, and you now have to open it yourself or pay someone to do it, you’ll never skip these steps again. Ask me how I know this.
Final Issues
When you change a safe from one lock type to another, you might void the safe manufacturer’s warranty by doing so. The UL listing or security rating of the safe also might change if you change the lock on a UL-listed safe. It’s important that your customer knows this before you proceed.
Most manufacturers will honor the warranty only if it has the lock that came with the safe from the factory, and the UL label also must remain the same. There are some exceptions. For example, if you remove a Group 1 high-security lock and replace it with another Group 1 lock, this might be acceptable.
It’s imperative to disclose all of this on your invoice in writing to your customer. You never know what someone might want to come back and sue you for. I say this simply to make you aware of the possible implications and liability issues you might run into later if there’s a problem from a failure or attempted break in.
Fortunately, I find that most safes that I work on are already out of warranty on the lock, so it doesn’t really matter. The customer just is happy to have a system that better meets their requirements.
Wayne Winton is the owner of Tri-County Locksmith Services, located in Glenwood Springs, Colorado. Please scan the QR code for more information.
