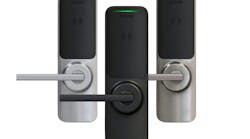
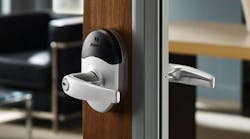
Today’s project involves installing Schlage AD-400 Series networked wireless locks, using the Major Manufacturing HIT-66 280 jig. This versatile integrated lock is one of the hottest components on the market for school systems right now. Options include multi-card PIN factor authentication, multi-technology open architecture solutions, 900 megahertz wireless capabilities and much more.
Because this is a big job, we needed a full crew: myself, John Nolan and Aaron with Reliance Security and Josh Westmoreland who works with me. (Photo 1) We had quite a few of these locks to install. (Photo 2) This was a big project and took a lot of manpower and tools.
In preparation for installing all these locks, we set up a cart with a lot of Milwaukee pack-out tools and drills set up with different drill bits we would need already attached. (Photo 3)
Before starting the installation, the first steps were learning about the locks and the tools needed for installation, starting with the Major Mfg. HIT-66 280 Template for the Schlage AD-400 mortise lock. These are the additional tools that you're going to need: hole saws, regular drill bits and non-spade bits.
Photo 4 shows the hinge pocket. We're taking the Major Manufacturing instructions and breaking them down and showing how those instructions are applied out in the field.
The first step is to install the mortise lock positioning plate. This plate will fit into the 1 -1/4-inch by 8-inch faceplate cut-out. There will be a 3/8-inch diameter pin centered on the plate. There is no top or bottom to worry about.
This plate goes in the mortise body pocket and then the jig actually centers and mounts on top of that post. Photo 5 shows the jig completely installed on the door.
Depending on your application, you may or may not need to use the hole saw to drill out for cylindrical lever prep or the mortise body. We're going to be using all mortise body prep here.
Start by drilling all of the holes located by the silver-colored drill bushings. There are a total of six holes. We used the 7/16-inch drill bit and drilled halfway through from both sides. This prevents you from blowing out the wood on wood doors. On metal doors, it's a little bit different, but you still follow the same drilling pattern. We did both wood and metal.
We’re going to continue those 7 /16-inch holes for the mounting bolts and mounting locations. Photo 6 shows the other side of the jig on the outside.
Next, we drill the three-quarter inch drill locations. You can use a hole saw or they do actually make a three-quarter inch drill bit.
These holes are for the door position sensor and for the location where we're going to pull some of the wires through. In photo 7, Josh is using a three-quarter inch high-speed drill bit as opposed to the hole saw because the hole saw was not removing the plug.
Next we drill the four 3/8-inch holes located around the outside and you're just about done with the project.
We actually had to take the two and a quarter inch hole saw and drill that out. Apparently that was required for this particular application per the manufacturer specifications.
Now after we take the jig off, you can see that the door is prepped and ready to go. We'll refer back to Major Manufacturing's information and instructions before continuing the process in case we missed anything.
I could not imagine trying to install this lock without this jig. It would be an absolute and utter complete nightmare.
Once the door is prepped, we slip the mortise body in and finish the installation.
Read about the AD-400 mortise body installation in the April issue of Locksmith Ledger or online at https://locksmithledger.com/53056156 and watch the video at https://youtu.be/BjEKJGDqnpk.
For more information, check out Wayne'slockshop.com and lockreference.com.
Wayne Winton is the owner of Tri-County Locksmith Services, located in Glenwood Springs, Colorado.