Chicago-area locksmith company received a request to install electrified trim in place of mechanical trim on a Von Duprin 99 series exit device which was equipped with a mortise lock. The building is located in a busy college campus area and owners wanted to control public entrance into the building. A remote button at a service desk was to be installed to allow the outer trim lever to be used whenever accepted guests were to be admitted. During all other times, the outer trim lever was to be set in a fail-secure mode.
Electronic hardware retrofit installations are becoming more common today. Even if your locksmith business is not actively pursuing the installation of complete access control systems, there are opportunities to serve as a sub-contractor to install mechanical hardware for an access control company. Almost every access control job involves installation of mechanical hardware and locksmiths have the training and knowledge to do the job.
The locksmith installing this exit device trim acted as a sub-contractor. Another company had pulled the wiring to the door frame and the locksmith was called to furnish and install the electrified exit trim.
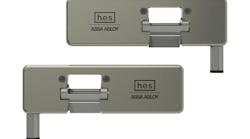
The electrified trim is shown on the right in photo 1. Installation hole patterns are identical for both the mechanical and electrified trim. The job consisted mainly of drilling wire access holes in the door, running wires through the correct locations in the exit device, and installing a wire loop to connect the wires to the door frame location.
The first step is to remove the exit device from the door. The mortise lock can remain in position because the new wiring holes are located under the lock case. More about the lock case is covered later in this article.
Photo 2 shows the locksmith marking the door for location of the wiring hole on the inside of the door. Similar marking was done on the outside of the door before drilling the wire access holes. Once holes are drilled on each side of the door, the wire cable included with the trim kit can be hooked to the lever trim (photo 4). Snap-in connectors simplify the wiring job.
Von Duprin instructions clearly show how to slide the pushbar off the chassis. Once the pushbar is off, the wire cable can be inserted along a housing groove in the chassis and extended out of the hinge end of the exit device. The exit device can then be reinstalled on the door.
To this point the entire installation took less than one half hour.
The last step was to install an armored loop to connect the wiring from the door to the door jamb. A Keedex K-DL38B armored door loop exactly matched the duranodic finish and was simple to install (photo 5). The finished installation is shown in photo 6. Water marks on the door are from a sudden spring shower.
The completed job operated well except for one problem. Formerly the outer cylinder could be used to set the trim to a locked or unlocked position. The new electrified trim was set to fail-secure (always locked). The outer cylinder now had no effect on the lever, so the owners could no longer enter the building with a key. Our usually dependable locksmith distributor offered no help. We were advised that the mortise lock we had was the only one available for Von Duprin 99 exit devices.
The locksmith then called the Von Duprin tech department. Von Duprin had the answer. The technician at Von Duprin stated that the mortise lock is field-changeable for either locking the trim or for retracting the latch. Von Duprin immediately e-mailed a full set of pictures and changing instructions. The locks must be out of the door and the cover removed to make the change, but the changeover was quick and easy using Von Duprin’s instructions.
For further information, contact your local locksmith distributor or call Von Duprin at 800-999-0408.