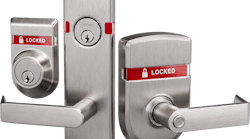
Mortise locks have always been the elegant choice on wood and hollow metal doors. The decorative trim can be likened to creating the right first impression. Upscale office buildings, luxury homes and executive suites proudly display their mortise locks on custom finish doors.
The mortise lock has gained this good reputation for its aesthetics and for providing a smooth, solid and secure feeling. Mortise locks are available with impressive variety of decorative trim ranging from antique to modern in just about every finish imaginable.
The functionality of a mortise lock is unsurpassed by any other type of locking door hardware. Having the largest lock body, mortise locks can be configured to meet the action required to retract the latchbolt (lock operation) for every application specified by ANSI/BHMA or the end user.
From a security standpoint, the mortise lock offers several important advantages, such as the ability to use just about every high security lock manufacturer's lock mechanism and the limited exposure offered by a mortise lock. In addition, there lock exposed, reducing the chances it can be easily attacked or vandalized.
The "form and function" capabilities are important as installation of a mortise lock requires a labor intensive "mortised pocket" cut into the edge of the door with openings to control the operation using any combination of handles, levers, mortise cylinders and thumbturns.
Mortise locks are available in different configurations including latch bolt only, deadbolt only and latch and deadbolt. The configuration determines the hardware required for operation. They can be installed into wood, hollow metal and aluminum glass doors. Aluminum glass door mortise locks normally have pivot bolt deadbolts with a 1-3/8" throw. The multi-plate bolt swings up in order to secure the door, whereas wood and hollow metal mortise locks have direct projection deadbolts.
The major disadvantage (or advantage depending upon how you are look at it) is there is no overall standardized door prep for mortise locks. The standard cylindrical lock has a 2-1/8" cross bore at usually 2-3/4" or 2-3/8" backset, with an edge bore of one inch. Through bolted cylindrical locks can have their cross bore holes at different positions and different diameters. However, drilling two additional holes beneath the rose does not affect the appearance. For all practical purposes, one manufacturer's cylindrical lock can be exchanged for just about every other manufacturers lock with little or no visible retrofit problems.
Mortise lock door prep varies by manufacturer and lock model. Unlike cylindrical and tubular locks, no standardized door prep has been developed for mortise locks. ANSI/BHMA A115 does require the mortise case and the strike plate located within a specific height range.
Mortise locks are available with 1-1/2", 2", 2-1/2" and 2-3/4" backsets. In addition to the variable backsets, the case and front dimensions, the locations of the hubs, the latch bolt and deadbolt all vary. Most commercial mortise locks have a 2-3/4" backset from the front plate to the center of the mortise cylinder, thumbturn, lever or handle pushpad.
This is why there are so many different templates and jigs for installing mortise locks. Major Manufacturing and Pro-Lok offer machined aluminum templates that are mounted onto a jig mechanism in order to position the templates onto the door to prep the front, the cross-bore holes and openings. Most templates are manufactured of aluminum using hardened steel bushing to machine accurate door prep and longevity. Most Major Manufacturing drill guide holes are identified for trouble free drilling. Each template and jig is color anodized to protect against corrosion and make it easier to identify.
The templates and jigs are designed for specific applications. For example, the Pro-Lok IN65 is for installing Baldwin mortise locks equipped with popular handle designs into wood doors. Since Baldwin mortise locks are available in different backsets, the IN65 includes a backset spacer.
Top selling Pro-Lok Templates
- IN321 Template for Corbin Russwin Access 600ML
- IN334 Template for Corbin Russwin Access 700ML TCPAC1 Offline
- IN336 Template for Corbin Russwin Access 700ML TCPIP1 Online
- IN434 Template for Sargent Passport 8200 PG Offline
- IN436 Template for Sargent Passport 8200 P1 Online POE
- IN438 Template for Sargent Passport 8200 P2 Online POE
- IN486 Template for Sargent Profile 8200 G1.5/LK/N1/S1/S2
- IN500-MORT Template for Schlage AD Series
- IN510-MORT Template for Schlage CO Series
Top Selling Major HIT-66 Templates
The Major Manufacturing HIT-66-272 template is used to prep a wooden door for Sargent mortise locks including the 7800, 7900, 8200 and 9200 mechanical mortise locks and the Low Profile Series G1, N1, & S2 electromechanical mortise locks. The template set includes both inside and outside template guides.
- HIT-66-110 Template Guide for Cylindrical Lock Installation
- HIT-66-210 Template for Alarm Lock DL3500 Mortise Locks
- HIT-66-230 Template for Best 34H-37H Mortise Locks
- HIT-66-235 Template for Corbin/Russwin Mortise Locks
- HIT-66-240 Template for Falcon MA Series Mortise Locks
- HIT-66-255 Template for Marks Series Mortise Locks
- HIT-66-272 Template for Sargent Mortise Locks
- HIT-66-280 Template for Schlage AD Electromechanical Mortise Locks
- HIT-66-281 Template for Schlage CO Electromechanical Mortise Locks
- HIT-66-282 Template for Schlage L Series Mortise Locks
To install any of the above mortise lock models into a wooden door, the mortise pocket must first be cut out. The following four mortising tools are available to cut out the mortise pocket.
- Major Manufacturing HIT Lock Mortiser
- Porter Cable Model 513
- Pro-Lok INJIGC-MORT - Mortise Lock Installation Jig
- Virutex Lock Mortiser FC16U
The Porter Cable and Virutex are equipped with a built-in motor. The Major and Pro-Lok tools require a drill motor to power the cutter. Using a corded drill motor is strongly recommended, as a battery operated, drill motor may not be able to maintain sufficient torque and cause a jerking action. Watch a video of the Virutex lock mortise in action at http://www.youtube.com/watch?v=K7Hy7abKRSk&sns=em
To install a mortise lock into a wood or composite door requires a pocket drilled into the edge of the door with the centerline of the door prep at 39-3/16" above the finished floor. In the early days, the pocket was cut out using a brace and bit. The brace is a U-shaped steel hand tool that has a wood cap on one end and a bit chuck on the other. In the center of the U-shape is wooden handle that rotates freely. The brace is about 18 inches long, giving the operator the ability to exert a significant amount of torque while using his body to keep the auger bit at precisely 90 degrees and parallel to the door skins. The diameter of the auger bit is determined by the thickness of the mortise lock body.
Important: If the mortise pocket is being drilled with the door mounted into the opening, wedge the door to be sure it does not swing.
Mark the location for the mortise pocket onto the swing edge of the door. Measure the depth of the pocket onto the bit and wrap a piece of electrical tape at the desired depth. The tape is easy to see when the bit has reached the proper depth in the door. With a very sharp auger bit installed, place the tip of the bit at either the top or bottom of the pocket and your body against the wood cap. When you are certain the brace is 90 degrees from the edge of the door, slowly crank the wood handle turning the auger bit and cutting into the edge of the door. Cut a small amount of wood and pull out on the brace to remove the shavings from the hole. Repeat this procedure until the hole is drilled to the required depth.
To create the pocket, drill a series of holes about ¼" deeper than the mortise body. Leave a minimal distance between the adjacent holes. Do not drill into an adjacent hole as it is harder to control the brace. Once a series of holes, usually six or seven have been drilled to the proper depth, the next step is to remove the webbing between the drilled holes to create the pocket for the mortise lock body. Use a sharp chisel, clear the webbing slowly, being careful not split the wood damaging the door face.
Cutting out the pocket using hand tools is not easy, as the average door will vary from 1-3/8" thick (interior) to 1-3/4" thick or greater (exterior). When mortising an interior door, there is less than 3/16" of wood on each side of the bit.
Be extra careful to avoid drilling through the door face with the auger bit. If the door is stained or clear finished, this mistake results in the door having to be replaced (at your expense). Cutting out the mortise pocket and the opening for the front using a brace and bit takes a couple of hours to complete.
Important: It is always strongly recommended to test the operation on a 2x6 prior to actually cutting out the mortise pocket.
Common choices for motorized mortise lock mortisers to cut out the pocket are:
- Major Manufacturing HIT Lock Mortiser
- Porter Cable 513 Mortiser
- Pro-Lok Mortise Lock Installation Jig
- Virutex Lock Mortiser FC16U
Each of these tools is specifically designed to dramatically cut the time required to cutout a mortise pocket.
Major Mfg.’s HIT Lock Mortiser is the combination of the HIT-66 Clamp System and the HIT-66-200 Mortiser. This lock mortiser includes a one-inch carbide tip mortise bit, mortise guide plate and stop collars. The mortiser drills holes and removes the webbing to create a mortise pocket for a mortise lock. The maximum size of the mortise pocket is 9-1/2" tall by 1" wide by 6" deep. The door range is 1-1/4” to 2-7/8”. A drill motor with a ½" chuck is required.
The Porter Cable 513 Mortiser has a built-in 1-3/4 horsepower motor that operates at 27,500 RPM. The Porter Cable 513 cuts a mortise pocket up to 7" height, 1-1/4" wide and 4-3/4" deep. The 513 automatically centers the cutter on doors up to 4-1/2" thick. There are height and depth adjustments for multiple doors. To cut out opening for the front, the Porter Cable 517 Lock Face Templet makes use of a router to cut the opening. A corner chisel can be used to square the opening.
The Pro-Lok INJIG-MORT Mortise Lock Installation Jig cut out the mortise pocket up to 6 inches deep and the opening for the faceplate. The self-centering jig clamps onto the door faces. Pro-Lok uses a combination of a long boring shaft and a cutter to create the mortise pocket. This configuration provides two advantages; the cutter is smaller and the cutter can be removed and a different cutter installed without having to remove the jig from the door. Three wood boring cutters 7/8", 1" and 1-1/4" are included with the jig. The INJIG-MORT kit comes in a molded carrying case. The INJIG-MORT mortise lock installation jig can be used to prep an aluminum door for an Adams Rite style storefront door lock using optional cutters and short boring shaft.
The Pro-Lok Mortise Lock Installation Jig’s available Offset Mortise Adaptor, the INJIGC-MORT-OMA, can be used to mortise butt hinges and strike plates. This side -slide attachment uses the INJIGC-MORT body to mortise out the door or jamb. The offset adaptor can be used on doorjambs less than 3-3/4" thick.
The Virutex Lock Mortiser FC16U has a built-in 1-1/2 horsepower motor that operates at 23,000 RPM. The FC16U is designed to mortise the front using a larger diameter bit and a chisel to square the edges. A built-in vacuum port collects shavings and dust. In addition to the standard 1-inch diameter cutter, Virutex has cutters ranging from 5/8" to 1-1/4" as well as metric cutters.
Important: Always wear eye and hearing protection when using power tools.
Once the mortise pocket and the opening for the front have been cutout, insert the mortise body and front to be certain they are flush with the edge of the door. Use the template(s) to complete the door prep. For this article, we will discuss the Major Manufacturing HIT-66 Clamp System and the new Pro-Lok Professional Installation Template Series using the INCL-PRO Professional Series Installation Clamp.
Important: If the lock is available with different backset options, make certain you know the backset of your specific lock before drilling the door. To determine the backset, measure the distance from the front to the center of the mortise cylinder opening or the center of the hub. This distance is the backset.
The new Pro-Lok INCL-PRO clamping mechanism accommodates two templates, one exterior and one interior, for mortise lock door prep. It works with the top-selling electromechanical templates discussed previously in this article.
To prep a wood door that already has a mortise pocket, choose the template set according to the lock manufacturer and model. Attach the templates to the INCL-PRO using the three Allen screws. Mount the template-equipped jig onto the edge of the door at the designated height to align with the mortise pocket. The clamping mechanism holds the templates directly against the face of the door. The templates are equipped with the manufacturers' specific hole sizes.
The Major Manufacturing HIT-66 self-centering clamp system is designed for doors from 1-1/4" to 2-7/8" thick. It includes HIT-4509 mortise lock locator and a T-handle Allen wrench.
Choose the template or set according to the lock manufacturer and model. Attach the template(s) onto the clamps. Install the mortise lock locator plate into the faceplate cutout. Locate the clamping system onto the lock locator plate pin to position the templates. Secure the HIT-66 onto the edge of the door. Use the designated drill bits or holesaws to complete the door prep.
Templates help ensure accurate door prep and limit the possibility of damaging the door. Even with mortising tools and templates, take your time to properly install the mortise locks.
For More Information
Mortise locks are available for mechanical and electromechanical lock operation. The following is a partial list of mortise lock manufacturers, with phone numbers and web sites.
Acorn Manufacturing (skeleton key operated mortise locks): 508-339-2977, www.acornmfg.com
Baldwin: 800-566-1986, www.baldwinhardware.com
Corbin Russwin: 800-543-3658, www.corbinrusswin.com
Emtek: 800-356-2741, www. emtek.com
Falcon: 877-671-7011, http://us.allegion.com/brands/falcon/Pages/default.aspx
Kaba: 800-849-8324, www.kaba-ilco.com
Marks USA: 631-225-5400, www.marksusa.com
Omnia: 973-239-7272, www.omniaindustries.com
Onity: 770 497 3949, en.onity.com
Sargent: 800-727-5477, www.sargentlock.com
Schlage : 888-758-9823, www.schlage.com
TownSteel: 626-965-8917, www.townsteel.com
Yale: 800.438.1951, www.yalecommercial.com
The following is a list of mortise lock installation tool manufacturers mentioned in this article:
Major Manufacturing, Inc.: 714-772-5202, www.majormfg.com
Porter Cable: 888-848-5175 www.PorterCable.com
Pro-Lok : 714-633-0681, www.pro-lok.com
Virutex: 800-868-9663, www.virutex.com