Within the security industry, it is difficult for end users of electromechanical products to remain up to date because of the rapid advances in technology. As a result, it is not practical to have a customer replace locks every few years to have the most advanced security.
However, there is a point in time when the existing security no longer provides the required protection. For example, a relatively new feature that has become a requirement for many educational facilities is emergency global lockdown. These facilities also need the ability to delete users from all of the locks at one time. Networked locks can provide those features as well as an audit trail and the ability to schedule programming updates and audit trail retrievals to run automatically during off hours.
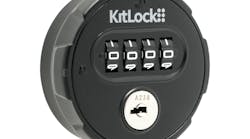
When that time comes, Alarm Lock has developed an upgrade path for their cylindrical and mortise electromechanical locks that provides a cost savings alternative to complete replacement. Alarm Lock upgrade kits are designed for all of the Trilogy models starting with the DL2700 cylindrical and the DL3500 Series Mortise Locks to bring them on par with the latest version of the Networx PIN (DL610026DUP- GRD cylindrical/DL650026DUP- GRD mortise) or PIN/prox (PDL610026DUP- GRD cylindrical/ PDL650026DUP- GRD mortise) Wireless Access Locks.
The component kits to upgrade a Trilogy cylindrical model to a Networx lock includes a DL 6100 or PDL6100 outside digital keypad housing (with prox for PDL61000), an inside housing with radio, mounting plate and four "C" cell battery pack. Similar components are in the Trilogy mortise lock upgrade kits. The upgrade kits reuse existing Trilogy lock bodies, levers, cylinders, latches (if cylindrical) and strike plates.
Upgraded Alarm Lock Networx locks can be operated along with the earlier models using the DL-Windows database V4.1.x or higher. This permits a seamless and not time restricted upgrade path for facilities having different models of the Trilogy locks.
Alarm Lock Trilogy cylindrical lock models that can be upgraded include the DL2700, DL2800, DL3000, PL3000, PDL3000, PDL3000K, DL3200, DL5300 and the PDL5300. The Alarm Lock Trilogy mortise lock models that can be upgraded include the DL3500 and the PDL3500.
The DL2700, known as the T2, is a standalone electromechanical cylindrical keypad operated lock that was introduced in 1994 with 17 users and enhanced to 100 users in 2005. Technical advances at the time included up to 100 multi-level user codes including the Master, 10 Manager, 90 User and 3 Service Codes. Codes can be organized by groups or individually. User codes could be from three to five digits. The T2 is keypad programmable at the door and equipped with key override. A two-wire remote override could provide access for individuals who were not given a code.
Depending upon the lock model being upgraded, door prep hole modification may be required in order to install the Networx lock. For example, if the DL2700 has a ¾" diameter connector wire/cable hole, it must be enlarged to one inch in diameter. Enlarging the hole will not affect the NFPA 80 rating on a fire rated door.
Up to 2,000 doors equipped with Trilogy Networx Locks can be programmed using the Alarm Lock DL-Windows software. This free software can be used to program up to 5,000 users with three- to six-digit numeric PIN code and most HID format proximity identification cards or badges. They can communicate wirelessly via Ethernet or 802.11B/G, permitting programming at a single location instead of at each lock. To protect against tampering or interference, there is a 128bit AES PC encryption with proprietary RF-link lock to Gateway communication encryption. The event log can contain up to 35,000 events. Additionally, the Networx locks have extended battery life expectancy to exceed five years under normal operation.
For this article, we will upgrade a Trilogy DL2700 (T2) cylindrical lock to Networx PIN and prox model PDL6100. To upgrade the T2, the lock must be removed from the door.
Begin by removing the inside lever.
The next step is to remove the inside housing. Remove the four Philips Head screws. Two are used to secure the thru-bolt mechanism for the inside housing and two secure the upper sides of the inside housing.
Depress the inside lever retainer and carefully lift the inside housing off the door. With the inside housing removed, there is access to the battery, wires and connectors. Unplug the battery and motor wires connectors. Remove the battery from the Velcro attached mounting plate.
Use the key to rotate the plug in order to depress the retainer, securing the outside lever to the lock. A lever release pin is provided with the kits. Remove the lever.
Remove the two Philips flat head machine screws securing the mounting plate to the outside housing.
Depress the outside lever retainer and carefully lift the outside housing off the door.
Do not remove the cylindrical lock body or the latch mechanism that are still attached to the door.
At this point, the door is ready for installation of the 6100 Series mechanism.
Note: Compare the DL/PDL6100 template with the existing door prep. Upgrading may require drilling additional cross bore holes and/or enlarging the wire/cable hole to one inch in diameter. For this upgrade, four 3/32" diameter holes need to be drilled for mounting plate. See provided template.
If necessary, drill the four 3/32" diameter holes one inch deep to secure the mounting plate.
Slide the ribbon cable through the one-inch cross bore opening. Slide the outside housing onto the lock body, making sure the threaded rods slide into the two 3/8" cross bore openings.
Locate the mounting plate onto the inside with the two middle counter sunk holes lining up with the 3/8" diameter holes. Install the two provided Philips flat head screws. Do not tighten the screws until the outside housing is plumb.
Install the four provided Philips flat head screws through the mounting plate, making sure the plate is plumb.
Install the outside lever.
Attach one side of the provided Velcro onto the mounting plate in the position of the battery chamber within the inside housing.
Connect the ribbon cable connector to the circuit board and make sure the two wire connectors are accessible with the inside housing is installed.
Slide the inside housing onto the lock body. Install the thru bolts (screws). Do not tighten quite yet. First, install the upper black screws securing the plastic portion of the inside housing. Do not overtighten these screws. Then tighten the thru bolt screws.
Install the inside lever.
Attach the motor connector and the battery pack connector. As the battery pack connector is being attached, the PDL6100 will beep. Test the operation of the PDL6100 by entering the default code 1-2-3-4-5-6. Each time a button is pressed, a beep sounds. When a correct code is entered, the motor will engage and the outside lever handle will retract the latch.
There are two choices for securing the battery cover:; Philips Head screws or Snake Eyes security screws. Install the two black screws securing the cover.
The Alarm Lock PDL6100 upgrade is installed. This upgrade kit enables your customers to extend their level of access control, security and programming to network capable proximity/keypad equipped electromechanical locks.
For more information, contact your local locksmith distributor or Alarm Lock at www. alarmlock.com/networxupgradekits.html