Door Jamb Repair Made Easy
Sell this product as an add-on while at almost every service call. That sounds very good and so is the product we are talking about. It is a new jamb repair system called Strikemaster II. The product is designed to either quickly repair wooden door jambs that have been split or as a deterrent to help prevent split jambs before it happens.
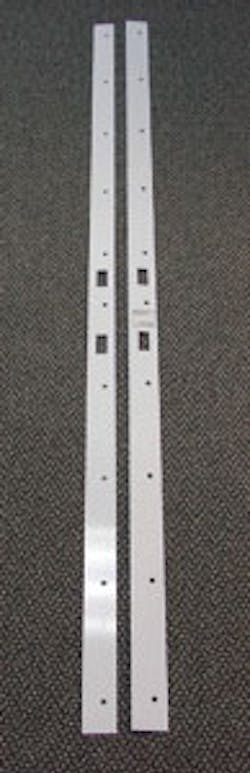
Strikemaster II consists of two parts which are each approximately 60 inches in length (photo 1). One of the parts has a 90-degree bend on one side to form a 1/4" lip. The second part is flat. Both parts are made with latch and deadbolt cutouts in identical positions.
Normal latch strike plates are usually only two to five inches long and use short screws which just hold into the door jamb fascia board. Strikemaster II was designed to spread the holding force over a much larger area. Longer 2-1/2" screws anchor the Strikemaster II into both the door jamb plus the interior wall studs.
Begin installation by removing the existing latch strike plate (photo 2). If there is a deadbolt lock installed, that strike plate can remain. Deadbolt locks are often factory-installed with a center-to-center measurement of 5-1/2" to 6" between the latch and deadbolt locks. Strikemaster II is furnished with strike plate cutouts for these same measurements.
Our installation had a pre-existing deadbolt installed, but the center-to-center measurement was greater than 5-3/4". As a result, a new cutout to accept the deadbolt had to be made. The Strikemaster II was placed against the door jamb and the latch cutout hole was aligned with at the existing door jamb latch hole. A new hole location was determined and lines penciled in for cutting (photo 3).
A square hole was then trimmed out with a sabre saw. The square hole was made to blend in with the factory original holes in the Strikemaster II, but a round hole cut with a hole saw could also have been made and would have been easier and faster to cut out. The new hole measurements were transferred to the second Strikemaster II part and a hole was again cut out in the same manner as in the first part.
This installation was on a garage service door which had no inside door frame trim. When the installation is on a door with trim, the area between trim and door frame may have to be cleared slightly with a sharp knife so the Strikemaster II can be tucked between the frame and existing trim. The Strikemaster II is specially designed in two parts so the thin lip section can be installed without removing the existing trim while the two parts provide dual thickness and strength for the door jamb itself.
Be sure that both pieces are aligned with the latch and deadbolt strike areas, and then drill one or two holes starting near the center latch cutouts. Insert the long threaded screws (photo 4) and snug the Strikemaster II onto the door jamb. Do not over tighten the screws at this time.
Continue drilling and installing while working your way alternately toward the top and bottom of the door. Strikemaster II is thin enough to fit between jamb and door in most cases. If the door rubs against the Strikemaster II after installation, then tighten each screw slightly to pull the jamb slightly inward and away from the door.
Photo 5 shows the finished product. The completed installation required about 30 minutes' time because of cutting the new deadbolt holes. An installation on a door with standard factory dimensions between strike plate holes will require much less time.
The Strikemaster II is available in five different finishes and provides an efficient, quick, finished looking solution for door jamb security.
For further information contact Safe Homes International, 1323 Red gate Ave., Norfolk VA 23507. Telephone: 757-456-5599. Website: www.A-Safe-Home.com.