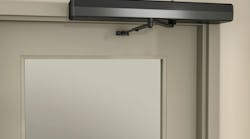
Securing each door of a pair of standard doors is accomplished using several different methods. The most common method is to use a concealed or surface vertical rod exit device on each of the doors. This way, a vertical rod exit device secures each door individually. When one door is opened, the other door remains secured. The overall appearance is the same for both doors.
For many installations, especially expensive wood door entries, the use of a cylindrical or mortise lock is more appealing. But how do you control the doors from swinging open? A mortise and cylindrical lock is not designed to secure the door closed in a double-door application. The solution: equip the door without the lock with a flush bolt, which is a mechanism that secures the door when closed. In this scenario, the lock-equipped door becomes the active door and the door without the lockset becomes the inactive door. The inactive door is secured, keeping both doors from swinging open when closed. The inactive door also limits the traffic flow by remaining closed when the active door is opened. The inactive door can not be opened without first opening the active door.
To control an inactive door, flush bolts are mounted into the top and sometimes the bottom corners of its swing edge. Flush bolts have a bolt that extends either manually or automatically into the header and sometimes the threshold to secure the door when closed. Manual flush bolts require a toggle to move up or down to extend or retract the bolt.
Automatic flush bolts are designed to secure the inactive door on a pair of doors when both doors are closed. As the active door closes, the door edge pushes in the trigger on the automatic flush bolts mounted into the inactive door. Pushing in the trigger causes the vertical bolt to extend from the door top and bottom into the strike opening in the header and the threshold, securing the inactive door in the closed position. Once the active door has been opened, the bolts retract and the inactive door can be opened.
NOTE: When installing automatic flush bolts, install a door coordinator to ensure that when both doors are opened, the inactive door closes first. Then the active door will activate the automatic flush bolts, securing the inactive door.
Major Manufacturing is introducing the HIT-42FB8, an anodized aluminum jig, which prepares wood doors for installation of Ives automatic flush bolts. These flush bolts require two cutouts, one for the guide and faceplate and one for the bolt mechanism. The bolt mechanism is approximately 7 inches long, 2 inches wide, and 1 inch thick.
To accommodate the two different sized cutouts, the HIT-42FB8 jig has a removable template. With the template removed, the opening is created for the guide and face plate. Then with the template attached, the mortise is cut for the housing of the bolt mechanism. The template is secured to the jig using Phillips head screws.
Ives automatic flush bolts can be installed individually or in pairs, one top and one bottom in the inactive door of a pair of doors. The door prep is the same for both. The difference between top and bottom flush bolts is the position of the trigger. Note: When installing the Ives automatic flush bolts, the recommended clearance between the active and inactive door is 1/8". The maximum undercut for the inactive door is 3/4".
The Major Manufacturing HIT-42FB8 is designed to accommodate 1-3/4", 2" and 2-1/4" thick doors. This installation jig is designed to operate with a router using 1/2" diameter cutter and a 5/8" diameter template guide. Major Manufacturing has determined that the best cutter for this jig is a two flute upshear cutter.
Major Manufacturing recommends using at least a 10-amp, plunge-style router to prepare a wood door for the Ives automatic flush bolts. For this installation, we used a Porter Cable Model 691 with the available plunge router base, part number 6931.
IMPORTANT: When operating a power tool, always wear eye, face, and ear protection. Always follow the manufacturer's instructions and cautionary notes.
Before starting the installation, make sure all door hardware is in proper working order, and the doors swing smoothly when opening and closing.
For this article we installed an Ives FB41 automatic flush bolt into a 1-3/4" thick door section, using the Major Manufacturing HIT-42FB8. The Ives FB41 is designed for installation into a wood door having a minimum thickness of 1-3/4".
Step 1. Carefully lower the door to the floor with the swing side of the door facing up. Secure the door.
Step 2. Draw a depth line onto the door to provide reference for bottom of cutout.
Step 3. Mount the HIT42FB8 to the swing edge of the door at either the top or the bottom corner. The jig needs to be secured to the door using either a wood or drywall screw along the top or bottom of the door, and a spring or C-clamp to secure the jig to the swing edge of the door. This way, the installation will be clean.
Step 4. With the template removed from the jig, machine out a 1/8" deep opening to accommodate the guide and the faceplate from the door edge and top or bottom. A sharp cutter will ensure a clean cut. For safety's sake, always wait until the cutter stops turning before lifting the router off the jig.
Step 5. Attach the template to the jig using the supplied Phillips head screws.
Step 6. Adjust the plunge router base to a maximum depth of 2 inches.
Step 7. Set each pass at 3/16" depth of cut. If the door is manufactured from hard wood, consider setting each pass depth at 1/8". Always wait until the cutter stops turning before lifting the router off the template. Once the completed, remove the jig and clean the machined area.
Step 8. Place the flush bolt into the opening, and check to be certain the door prep is deep enough and the bolt does not extend out of the door more than approximately 1/8" less than the minimum clearance. Test the operation of the bolt.
To adjust the height of the bolt, remove the guide from the housing and turn the bolt to raise or lower as necessary. Test the operation of the bolt.
Step 9. With the flush bolt placed into the door, drill the five 9/64" diameter pilot holes to mount the provided #8 Phillips head mounting screws.
Step 10. Install the five screws.
Step 11. Install the faceplate using the provided machine screws.
Step 12. Install the metal rub plate onto the edge of the active door inline with the trigger for each automatic flush bolt. The rub plate is mounted on the active door to protect the wood from the eventual damage caused by the trigger rubbing against the wood.
Step 13. Install the inactive door. With the inactive door closed, test the operation of the automatic flush bolt.
Step 14. Install a door coordinator to ensure that the inactive door closes first, then the active door when both doors are opened.
The use of automatic flush bolts makes it possible for both doors of a double-door entry to be opened without manually releasing the inactive door. At the same time, a cylindrical or mortise lockset can be used to control access.
For more information on the HIT-42FB8 jig, contact your local locksmith wholesaler or Major Manufacturing, Inc., 1825 Via Burton, Anaheim, CA 92806. Telephone: 714-772-5202. Fax: 714-772-2302. Website: www.majormfg.com.