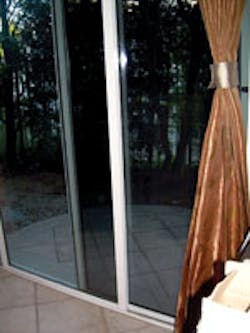
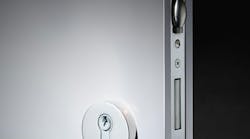
With the improved insulation values in sliding door glass, more residences and commercial buildings are “letting the sun shine in.” The increase of sliding glass doors increases the number of opportunities for unauthorized entry.
How are sliding glass doors secured? As far back as I can remember, the standard locks on sliding glass doors have been the flip-up hook type still used today. It appears that technology has not increased the level of security for the sliding glass door locking mechanism as it has the insulation value.
This provides the opportunity for an auxiliary lock mechanism. Major Manufacturing’s Octopod not only provides a lock mechanism, but also is designed to lock the sliding glass door at the top rail and/or the bottom rail of the frame, keeping the door from sliding when locked.
The Octopod is a surface-mount bolt (rod) lock designed for installation on sliding doors. It incorporates a gear-driven rod to provide the locking function. The 9”, 40” or 48” rod is raised and lowered by a special gear-shaped cam attached to the rear of a 1-1/8” mortise lock cylinder or thumb turn.
Because the Octopod is operated by a standard mortise cylinder, the lock cylinder can be keyed alike to the building key system. A special gear- shaped cam is available for the Octopod when used with a Medeco mortise cylinder.
The Octopod can be mounted into the floor and/or into the header depending upon the length of the rod(s). For many installations including ours, the Octopod can be mounted onto the door without modification.
For a standard door, the nine-inch rods can be used to mount the Octopod for operation at either the header or the floor. The 40” or 48” rod can be used to locate the Octopod close to the middle of the door to enable locking and unlocking without having to reach up or bend down. In addition, mounting the Octopod at the middle enables two rods to engage both the top and the bottom of the door. With two rods installed, it becomes much more difficult to lift the sliding glass door out of the track.
The locking mechanism is a rack- milled lock rod whose movement is controlled by a 1-1/8” mortise cylinder or thumb turn using a special gear-shaped cam that mounts onto the rear of the plug. The thumb turn provides keyless security when the door is closed. The geared cam turns, raising or lowering the locking rod. The Octopod is designed to become locked or unlocked with one complete revolution of the lock cylinder or thumb turn. The throw of the locking rod is approximately 2-3/8” in length.
For this installation, the homeowner wanted a white powder coated Octopod to be located near the middle of the door using a 40” rod, with a thumb turn to control its operation.
In addition to providing auxiliary locking, the purpose of the Octopod was to keep the doggie door in position. A doggie door is an inconsequential panel with an opening covered by a flap placed between a partially open sliding glass door and the jamb. Most doggie doors have very little substance and a non-securable lock mechanism. The Octopod will keep the sliding glass door in the proper position.
To install the Octopod onto the edge of the sliding glass door:
Step 1. Thread the thumb turn cylinder into the Octopod until the cylinder body is about flush with inside of the assembly and the thumb piece is vertical.
Step 2. Install the provided set screw using a 5/64” hex wrench to fix the position of the thumb turn.
Step 3. Insert the lock rod in the housing on the proper side for the installation.
Step 4. Locate the lock rod for the geared cam. See Drawing 1.
Step 5. Install the geared cam onto the plug using the two supplied Phillips head screws with star washers.
Step 6. Rotate the thumb turn until the rod is raised to the unlocked position.
Step 7. Position the Octopod onto the door edge with the rod plumb and touching the floor. Mark the location for the engagement hole.
Step 8. Drill the 7/16” diameter engagement hole approximately two inches deep. For this installation, we needed high speed drills as well as concrete drills.
Step 9. Position the Octopod onto the edge of the door and make sure the engagement hole is in the proper place.
Step 10. Rotate the thumb turn and raise the rod to the unlocked position.
Step 11. Position the end of the lock rod approximately a half-inch above the floor. Remember the throw of the locking rod is approximately 2-3/8” in length.
Step 12. Center the Octopod along the door edge.
Step 13. Mark the location of the two mounting holes in the assembly.
Step 14. Drill two 5/32” diameter openings starting with a 1/16” pilot bit. Use tape to permit the hole to just be drilled through the metal of the door edge.
Note: Use caution when drilling to avoid breaking the glass. Any holes drilled into the door should be at least 5/8” from the edge of the glass.
Step 15. Install the Octopod assembly using the supplied Philips head screws. Test to be certain the rod enters the engagement hole completely.
Step 16. Place two guides over the lock rod approximately one third of the way down from the Octopod, and the second guide approximately one third of the way above the floor.
Step 17. Mark the location of the two mounting holes for each of the guides.
Step 18. Drill two 5/32” openings for each guide, being careful not to break the door glass. Follow the precautions described in Step 14.
Step 19. Install the guides over the lock rod using the supplied Philips head screws. Test to be certain the rod enters the engagement hole completely.
Test operation of the Octopod.
The Octopod is available in aluminum, white, and Duranodic powder coat, polished brass and chrome. Locking rods are available in 9”, 40” and 49” long.
For more information, contact your local locksmith distributor or Major Manufacturing, 1825 Via Burton, Anaheim, CA 92806. Telephone: 714-772-5202. Web Site: www.majormfg.com. Fax: 714-772-2302.
