Exit Devices, Exit Bolts, Panic Devices, Panic Bars and Crash Bars are some of the names given to the door-mounted security and safety devices that allow free egress at all times for outswinging doors. These devices are commonly used as the lock mechanism on commercial and institutional building’s exterior doors.
The first “panic bar” was developed in the beginning of the 19th century. The invention was said to be a result of the 596 deaths that occurred during the Iroquois Theater Fire in Chicago. Panic bars were developed prevent this type of tragedy from occurring.
The unique feature of the “panic bar” versus the standard locks of the day was the ability to open the door – even when it was locked - simply by pushing the “bar” on the inside of the door. This type of release mechanism allows people to exit without having prior knowledge of operation. There was no need to know how the lock operated. With the “panic bar” pushed, the lock mechanism would unlock and the door could be opened. Therefore, the door could be opened by any horizontal force on the “bar,” especially if there was a panic causing people to “crash” into the doors in hopes of escaping a dangerous situation.
Building owners and tenants did not want to leave their doors unlocked or made easily accessible from the exterior. The basic design of the exit device permitted the door to remain locked from the outside to prevent unauthorized access.
The “panic bar” mechanical lock consisted of a tubular bar extending just about the full width of the door that was attached to two small hinging mechanisms. The hinging mechanism on the lock side of the door was connected to a locking mechanism that would lock and secure the closed door within the jamb.
Over the years, the designs of these devices evolved in a number of directions. The most common version is a bar assembly with push rail mechanism exit device. One of the reasons for the design was the development of surreptitious entry tools that could hook onto the bar and when pulled, retract the locking mechanism and permit the door to be opened from outside.
NOTE: To accommodate Life Safety Codes, the push rail portion of the bar assembly exit device must extend at least halfway across the width of the door.
There are four different types of exit devices: rim, mortise, concealed vertical rod and surface vertical rod exit devices. Exit devices come fire rated or non-fire rated.
Life Safety Codes determine the fire door locations requiring fire rated exit devices. Fire rated exit devices offer most of the same features as non-fire rated exit devices including design, finish and operation*. However, fire rated exit devices must be constructed of specific materials. This is because the exit device must be tested by a testing agency to keep the door locked for up to and including 3 hours under test conditions as determined by the various testing agencies.
*Exit devices equipped with dogging feature are not permitted on fire rated doors.
Rim exit devices are surface-mounted exit devices that are mounted on the secured side of a door in order to permit free egress. The latching mechanism for most rim exit devices is a Pullman bolt. Unlike cylindrical and mortise lock latches and bolts, the Pullman bolt swings out and in. The Pullman bolt has a less angled shape than a latch. To increase locking capability, the strike has a contoured shape that increases the locking strength of the Pullman bolt.
Mortise exit devices rod or bar assembly devices are designed to operate a mortise locking mechanism.
The basic vertical rod exit device has two-point latching into the jamb above the device and into the threshold/floor beneath the door. As an alternative, a one-point latching (top rod only) rod can extend vertically from the latch assembly. The vertical rod exit device top rod usually has a Pullman style bolt that locks against the top strike plate and the bottom rod usually has a deadbolt that slides into tubular bottom strike. Fire rated top rod only vertical rod exit devices will usually have some type of secondary independent lock mechanism that secures the door in place during a fire. Surface-mounted vertical rod exit devices have the rods and lock mechanisms mounted onto the secured side face of the door.
Concealed vertical rod exit devices have the rods and lock mechanisms within the body of the door. Most concealed vertical rod exit devices are installed in hollow core metal doors that have been built to accommodate this type of lock mechanism.
Over the years, a number of variations to the basic exit device have been developed. For example, Yale developed the SquareBolt latch in the mid 1990s. Similar to a cylindrical lock latch, the SquareBolt extends directly out from the assembly, unlike the Pullman Bolt that swings out.
There are exit devices equipped with a motor or solenoid mechanism that permits remote unlocking. Remote unlocking can be accomplished by having a button at a receptionist’s desk. This can eliminate the need for someone to go and unlock the door and relock the door once access has been gained.
Exit devices can be equipped with built-in panic alarms that sound when the door onto which the device is mounted is opened. The purpose of the panic alarm-equipped exit device is twofold. First, it provides life safety by allowing the device to unlock the door while notifying that there could be an emergency situation. These devices can be connected to a monitoring center. The second is to notify that the door is being opened without authorization. Many panic alarm-equipped exit devices require a key to reset.
Another variation is the delayed egress exit device. The delayed egress feature restricts the ability to press the bar and immediately open the door. Depending upon the Local Authority Having Jurisdiction (LAHJ), a delayed egress exit device can delay the unlocking of the authorized door for 15 or 30 seconds. Contact your locksmith distributor, factory or LAHJ for more information.
Exit devices are designed to be mounted onto the secure side of a door that swings out towards the unsecured side. Yale YM Series exit devices are available in three sizes, 36”, 42” and 48”. These measurements are not the actual size of the device; they are the width of the door they accommodate. A 36” exit device actually measures 32-3/8”. A 42” exit device measures 38-3/8”. A 48” exit device measures 44-3/8”. This is because most doors fit into a jamb whose stops cover a portion of the door face.
NOTE: Although there is no consensus between lock hardware manufacturers, the exit device is mounted approximately 39” to 42” above the finished floor. This range should satisfy ADA as well as codes and local ordinances.
APPLICATIONS
Exit devices can be installed onto single doors, pairs of doors, double egress doors or pairs of doors with center mullion.
1. For a single door, the most common application uses a rim exit device. The non-handed, surface-mounted device is mounted onto the secured side of the door and the strike is mounted onto the jamb. Rim exit devices can be installed onto flush or wide stile metal, wood or composite doors. The device can be installed with entry trim or as exit only.
2. For pairs of doors, the most common light traffic openings application uses one rim and on vertical rod exit device. The active door will normally be the one with the rim exit device. The inactive door will have the vertical rod exit device. The reason is the vertical rods secure the door in place when locked. The rim device strike is mounted onto the inactive door. If the rim device is unlatched, the active door can be opened even if the vertical rod exit device is secured. If the vertical rod exit device is unlatched, both the inactive and the active doors will open.
3. For a double egress opening (each door swings in the opposite direction) pair of doors, two vertical rod exit devices, usually surface mounted, are the most common application. For this two-way traffic control application, each door can have two-point latching, enabling each door to operate independently of the other. If either door’s vertical rod exit device is unlatched, only that door can swing open.
4. The fourth application is a pair of doors with the doorway equipped with a center mullion. The center mullion is part of the doorjamb and can be removable or fixed. The recommended application is two rim exit devices. The non-handed, surface mounted devices are mounted onto the secured side of the doors and the strikes are mounted onto the mullion. Rim exit devices can be installed onto flush or wide stile metal, wood or composite doors. The devices can be installed with entry trim or as exit only.
INSTALLATION: YALE YM SERIES
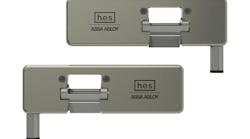
I installed a Yale® YME2100F rim exit device and a 426F trim with keyed lock cylinder and auxiliary lever onto the side door of a pre-school. The Yale YM™ Series exit devices are certified ANSI/BHMA A156.3, Grade 1. The YME2100F exit devices are UL-cUL Listed for use on fire doors having a rating up to and including 3 hours for a 4’ BY 8’ single or 8’ BY 8’ pair of doors. The default model is designed for a 1-3/4” thick wide stile or flush doors. The Yale YME2100(F) rim exit device is equipped with deadlocking Pullman bolt.
The Yale YME2100 exit device lever trims feature the patented Free Wheeling lever mechanism, a clutch mechanism that allows the lever to float down 60 degrees when operated in the locked condition without retracting the Pullman bolt. The feature improves vandal resistance.
Yale 426F trim was chosen because it was slightly wider and taller than the original trim. This way, replacing the original trim with the 426F would cover any unpainted areas and door prep from the original trim.
The exit device trim is handed. To reverse the handing from Right Hand Reverse (RHR) to Left Hand Reverse (LHR) requires replacing the “blue” lever return spring with the “red” spring. To eliminate the need for reversing the handing, the 426F trim can be ordered LHR. The default (non-specified) handing is RHR.
Install the rim cylinder onto the 426F trim, cutting off the excess from the rear of the tailpiece. The rim cylinder does not directly operate the exit device. The rim cylinder operates a lever which disengages the operating mechanism when locked. When unlocked, the operating mechanism is engaged and turning the lever handle retracts the Pullman bolt.
When installing most functioning trim, the non-secured side of the door must be prepped to accommodate the operating mechanisms. Very little of the door prep is bored through the door. The only holes bored through the door are for mounting and to operate the trim and the exit device.
The door onto which the Yale exit device was installed was a metal clad door. A clad door is covered in the cladding material. For this door, metal covered the faces and the edges of wood material core door. Cutting the prep opening to accommodate the trim required cutting away the metal cladding.
Over the years, I have learned a somewhat easier way to prep a thinly cladded door. I take an old wood chisel, sharpen the edge and cut through the cladding using the corner of the chisel. Wide side of the chisel is always on the side of the opening being removed. This keeps the remaining edge of the clad pretty-much flat.
Yale provides a clear plastic template that is placed against the door face and jamb. Holes are used to locate the mounting holes and the location of the latch assembly hub.
After drawing the outline for the prep using the provided templates as a guide, I chiseled off the metal clad. To remove the wood material from this door, I use the diameter hole saw that best fits the opening I need.
Note: Once my guide hole has been drilled, I replace the bit with a drill blank. The drill blank cannot further enlarge the opening and permits me to closely line-up at the opening edge.
Once the door has been prepped, two of the trim mounting screws secure the latch assembly to the door. The remaining two holes secure the other side of the trim against the door. Do not tighten the latch assembly to the door before installing the bar assembly.
The bar assembly is slid against the latch assembly, leveled and secured. Then the four trim/latch assembly mounting screws are tightened. The bottom end cap is secured to the bar assembly. The top end cap protects the push bar. The Yale YME2100F bar assembly is secured to the latch assembly by the cover. Test the operation of the exit device and trim with the door open. Test the operation of the exit device and trim with the door closed.
The Yale YM Series exit devices are available in standard 36”, 42” and 48” lengths, in a variety of finishes and there are a number of trim functions available. The YME2100 Series Exit Devices and Trim have a one-year warranty.
For more information, contact your local locksmith distributor or Yale, Web Site: www.yalecommercial.com